
⦁ Before starting with editing download and install the font which is used in the project (if you want to use the same font). https://fonts.google.com/specimen/Montserrat
⦁ Inside the "Digital 3D Logo Reveal" folder, there are 6 projects files with different color styles. Pick the one which you like, or open any of them and make your own style (all projects have the same controls for editing).

01_Original

02_Cyan

03_Green


05_Blue


The project is compatible with CS6 and all newer (CC) versions of After Effects. If you are using a newer version of After Effects, on opening you will get this or a similar message.
It's just information that the project is created in an earlier version of After Effects. Click OK, "Save" project with any name you want, and proceed to edit.

PLACEHOLDERS
Logo, Tagline, and Audio placeholders are placed inside the "_PLACEHOLDERS" folder.
LOGO COMPOSITIONS EDITING
Import (File/Import) your logo image with alpha channel (transparent background - PNG, Targa...) or in vector format (Ai, EPS...) to the project.
Double click on the "LOGO - Placeholder" composition to open it.

Turn off visibility or delete the existing text layer, and drag and drop your logo image on his place.

Press the "S" key on your keyboard to reveal scale controls if you want to change the size of your logo.
If you wish you can also use TEXT instead of the logo file. In that case, just double-click on the text layer and type your text.


Use the "Character tab" to set the font which you want to use and in the "Effect Controls" tab, you can adjust the Text gradient color.
TAGLINE COMPOSITIONS EDITING

In the "_PLACEHOLDERS" folder double click on the "TAGLINE - Placeholder" to open it.
Double click on the text layer and when the text is highlighted type your text.

Use the "Character tab" to set the font which you want to use.
In the "Effect Controls" tab you can adjust Text gradient color.


SCENE COLOR AND LINES SETTINGS
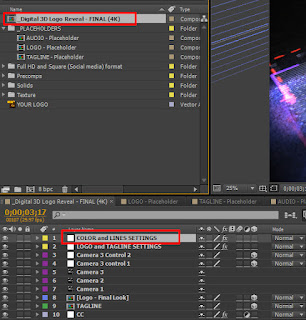
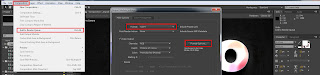
The first layer in the final composition is the "COLOR and LINES SETTINGS" layer. When you select it, in the "Effects Control" tab you will see controls for colors and lines look.
QUICK TIPS
One of the most important controls here is "Logo Extrude - Height".
Generally for simple shape logos or logos with bold texts you can set the "Logo Extrude - Height" value to 80-120, while for thinner text/shapes and more complex logos you can try to lower that value to 50-80 to get a better look of your logo during animation.


Also if your logo is complex or has thin text/shapes, you can try to adjust other settings like lowering the number of Crosses and Short lines and Lines width, to get a nice and clean look during animation.
LOGO AND TAGLINE SETTINGS IN FINAL COMPOSITION
The second layer in the final composition is the "LOGO and TAGLINE SETTINGS" layer. When you select it, in the "Effects Control" tab you will see controls for the final LOGO and TAGLINE looks at the end of the animation.


ADDING AUDIO TRACK
If you like the audio track which is used in the video preview, you can purchase it on the next link: https://audiojungle.net/item/glitch-digital-technology-ident/26150232
*There are 3 audio tracks included in ZIP from audiojungle (3rd short version 10sec is used in the video preview)
Import audio tracks to the project, and then double click on the "AUDIO - Placeholder" composition to open it.

Just drag and drop the audio track to the timeline, and be sure that the track is placed from the beginning of the composition (0;00;00;00).


RENDERING
There are one final composition (4K), and two Full HD 1920x1080 and Square (Social Media) 1080x1080 compositions ready to render.

Select one of them and go to the main bar "Composition/Add to Render Queue" option.
Inside the "Render Queue" tab click on the "Output Module" option to set the video format and codec which you want. Don't forget to check the "Audio Output" box to enable sound in the video render.
In the "Output To:" option set where you want to save the file. Then click on the "Render" button on the right side and wait for After Effect to finish rendering.

In newer versions of After Effects CC, there's no possibility to export video directly to standard H264 format. To get that format you can send the selected Final composition to Adobe Media Encoder where h264 format is supported: Composition > Add To Adobe Media Encoder Queue
Adobe's recommendation is to render out the video from After Effects as AVI (if you are on PC) or QuickTime (if you are on MAC) with NONE compression - which is maximum quality. When After Effects is done with rendering, import that file in Adobe Media Encoder and re-render it in a minute in any format you want.
If you need any additional help or some advice, please feel free to comment Below
I hope that you will like and enjoy this project! Thank you,
For Project File:
https://www.file-upload.com/2ixxm9emzm0y


0 Comments